
COMPARED TO WHAT WE HAVE SEEN SO FAR, this phase of our inspection will take up very little time. And we can congratulate ourselves for that, a little break will do us good.
Checking sails is not particularly difficult, but it is always better to be familiar with their feel, appearance and even sound. In any case, as a general rule we can say that the stiffer and “crunchier” they feel, the more time they have left to live and the more relaxed and soft they feel, the sooner they will have to be replaced. But let’s take it step by step.
Hoisting and general inspection of sails
▌Old sails are always a bet.
The first step is to hoist the sails to check their tension and elasticity. Sails in good condition should be kept taut, without forming unnecessary pockets or folds. If they are stretched and show significant deformations, these are obvious signs of wear.
Next, if there is enough space available nearby, we will spread them out for examination. And we add: if there is no space, we should find a place. It is difficult to assess the true condition of sails if we cannot inspect them fully extended.
Even if sails have been well used and maintained, they cannot be expected to maintain a perfect aerodynamic shape
Critical points on the mainsail
Here are some areas that are particularly vulnerable to wear:
- Batten sheaths: These parts tend to suffer the most wear from constant rubbing while sailing.
- Runners and fastening system: Inspect the parts that slide along the mast rail. Check their condition and whether the fastening systems are in good condition.
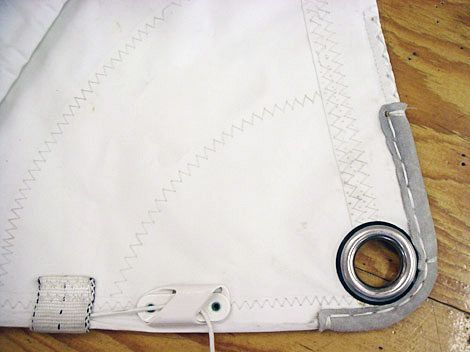
- Crosses (sail corners): Check for excessive wear or previous repairs. The cuffs bear much of the stress of the sail.
- Folding marks: Creases or marks caused by repeated folding and storage can wear down the fabric.
- Areas around the eyelets: Examine whether the eyelets are tearing or elongating, which would indicate significant wear.
Genoa Inspection
The genoa also requires attention. In particular, check the leech. Check for any scuffs or small cuts that could increase with use. The spreaders on the mast are often the main cause of this wear.
The following video is an excellent example of how to carry out this type of inspection.
Impact of ultraviolet (UV) radiation
Exposure to UV radiation is one of the main causes of ageing and deterioration of sails, but establishing an “expiry date” is not as simple as setting a maximum number of hours of exposure. This will depend on the more or less intensive use that has been given to them, the more or less sunny places where they have been sailed and the more or less careful care that has been given to them; all in all, more reasons to know the history of the boat we are examining.
UV radiation damage can affect different parts of the sail at different rates, depending on the materials used and the most exposed areas. The seams and the outer areas are usually the first to be affected. To find out the extent of this possible deterioration, we will subject the sails to some very simple non-destructive tests and inspection techniques.
Tests to assess UV wear:
- Light test: On a sunny day, spread out the sail and look at the sky through it. The most worn areas will let in more light. If you see pinpoints of light or the fabric seems especially thin, this is a sign of advanced wear.
- Controlled tear test: If there are any visible tears, try to slightly stretch them with your fingers (okay, this isn’t exactly a “non-destructive technique,” but we’re talking about just a little). If they give way easily, the material has lost its strength. If you can’t find any tears to work with, you could take a spot and apply force to it in a shearing motion, like you’d want to open a bag of sunflower seeds, and see how it behaves. The problem is that they probably won’t let you do that, so you’ll have to rely on your feelings.
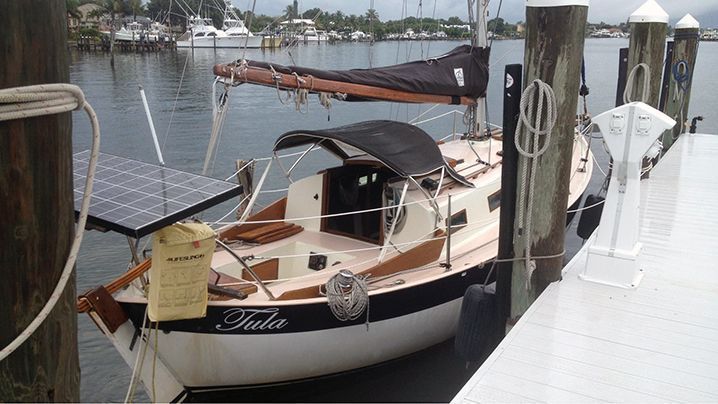
▌We will also test the seams with the rest of the fabric accessories: protective cover for the mainsail, bimini, etc.
Checking the seams
Seams are often the most fragile part of sails. To check their condition, you can perform a simple test:
- Pinching the thread: Use your fingernail to pinch the thread at various points on the sail. If the stitches break, that’s bad, as the thread has been burned by exposure to the sun. If the thread doesn’t break but frays, it could be rotting.
Most sails and covers are sewn with UV-stabilising polyester thread (Dacron) of varying thicknesses. Despite its impressive name, two years of UV exposure in the tropics would be enough to severely weaken it. Although techniques such as adding nano-components have been developed to improve their UV resistance, these threads are still cheaper and designed for a relatively short lifespan.
There is a relatively new type of thread that is little affected by UV rays and is made from PTFE (Teflon). It is slightly weaker than polyester when both are new, although not so much so as to compromise a sail, and after a period of exposure it maintains its original strength. In fact, it may outlast the sail itself. PTFE is not altered by light and slides very easily over other surfaces, so perhaps (and this is a guess, not the result of a laboratory test we have performed) it is more resistant to scuffing. Some sail makers avoid it because it is more expensive and difficult to use, but its use should be almost mandatory for UV protection bands, mainsail covers and all permanently exposed fabrics.
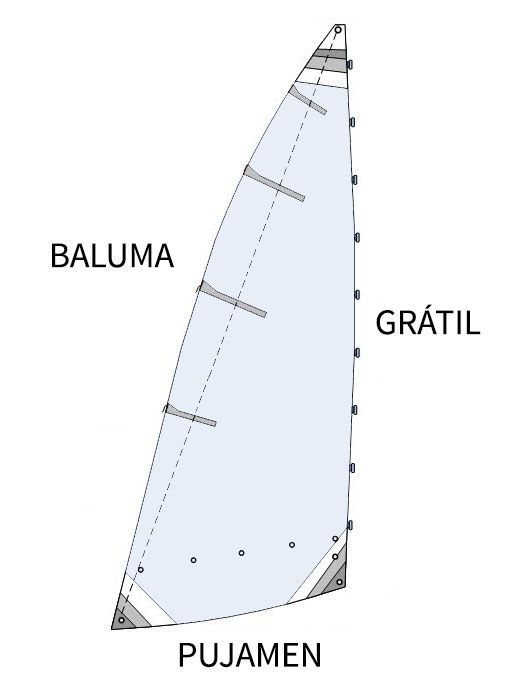
▌The loads on the sails tend to run parallel to their edges and are greater along the leech, which also deteriorates due to the fluttering and the subsequent action of the battens.
Maintenance and repair of old sails
Sails last a long time if they are properly cared for, and old ones can be patched and subjected to minor repairs. They can even be cut back to their original shape (sail deformation can cause a boat to list and capsize more than expected, for example) which is much cheaper than replacing them. In any case, this will not achieve any miracles and the wear and tear on them cannot be removed. In addition, a sail is not smooth; in fact, one of the difficulties of the sailing profession is knowing how to give it a correct three-dimensional shape, something that will be partly lost when we cut it back.
In any case, everyone knows what sailing program they have in mind: depending on the use we give to the sailboat, this way of extending its life may make sense.
And now for an opinion that may be debatable
It is clear that we all want what we pay for to be safe and functional, but if we buy our first boat with the intention of learning to sail and we only plan to go on trips for a day or a little longer, we can always adapt to being somewhat limited by old sails in exchange for saving some money. This has the added advantage that our first mistakes will be paid for by rags that have little to lose, although it is clear that at some point we will have to invest in new sails.
Summary of key points
- Key indicators: Stiffness (new sails) vs. softness (worn sails) are indicative of sail condition.
- Visual and tactile inspection: Hoisting sails allows for assessment of tension and shape, while spreading them out makes it easier to identify damage.
- Critical points: Batten covers, rails and fastening systems, cuffs, fold marks, and areas around eyelets.
- UV impact: UV radiation degrades sails. While there is no “best before date,” use, location, and care all influence their lifespan.
- Testing: Light testing and controlled tear testing.
- Importance of stitching: Stitching is a vulnerable point. Its strength can be assessed by pinching the thread. UV-stabilized polyester thread is common but degrades over time, while PTFE thread offers greater UV resistance.
- Maintenance and repair: Old sails can be repaired, re-adjusted to their original shape and are an economical alternative to buying new ones, especially for beginners.
Too much text? Listen to the podcast:
INSPECTING A SECOND-HAND SAILBOAT: A COMPLETE GUIDE